Welcome to Part 3 of the three-part series: A Step-by-Step Guide Building Your Personal Website with Jekyll and GitHub Pages.
In this post, we’ll refine the two repositories created in Part 2 by:
- Displaying blog posts on the home page.
- Creating a custom post layout.
- Adding a navigation bar for “About” and “Contact” pages.
We’ll implement these updates step-by-step and commit the changes separately to maintain a modular structure for both content and theme. By the end, you’ll have a flexible, polished website that’s easy to update and customise.

Manage Content and Theme Updates Separately Using Git Remotes
Let’s get started!
Steps:
1. Switch Theme to a New Branch
Before we begin, let’s create a new branch called customise_theme to ensure your main branch remains unaffected while you play around with the layouts.
cd /path/to/project-directory/slate
git checkout -b customise_theme
2. Display Blog Posts on the Home Page
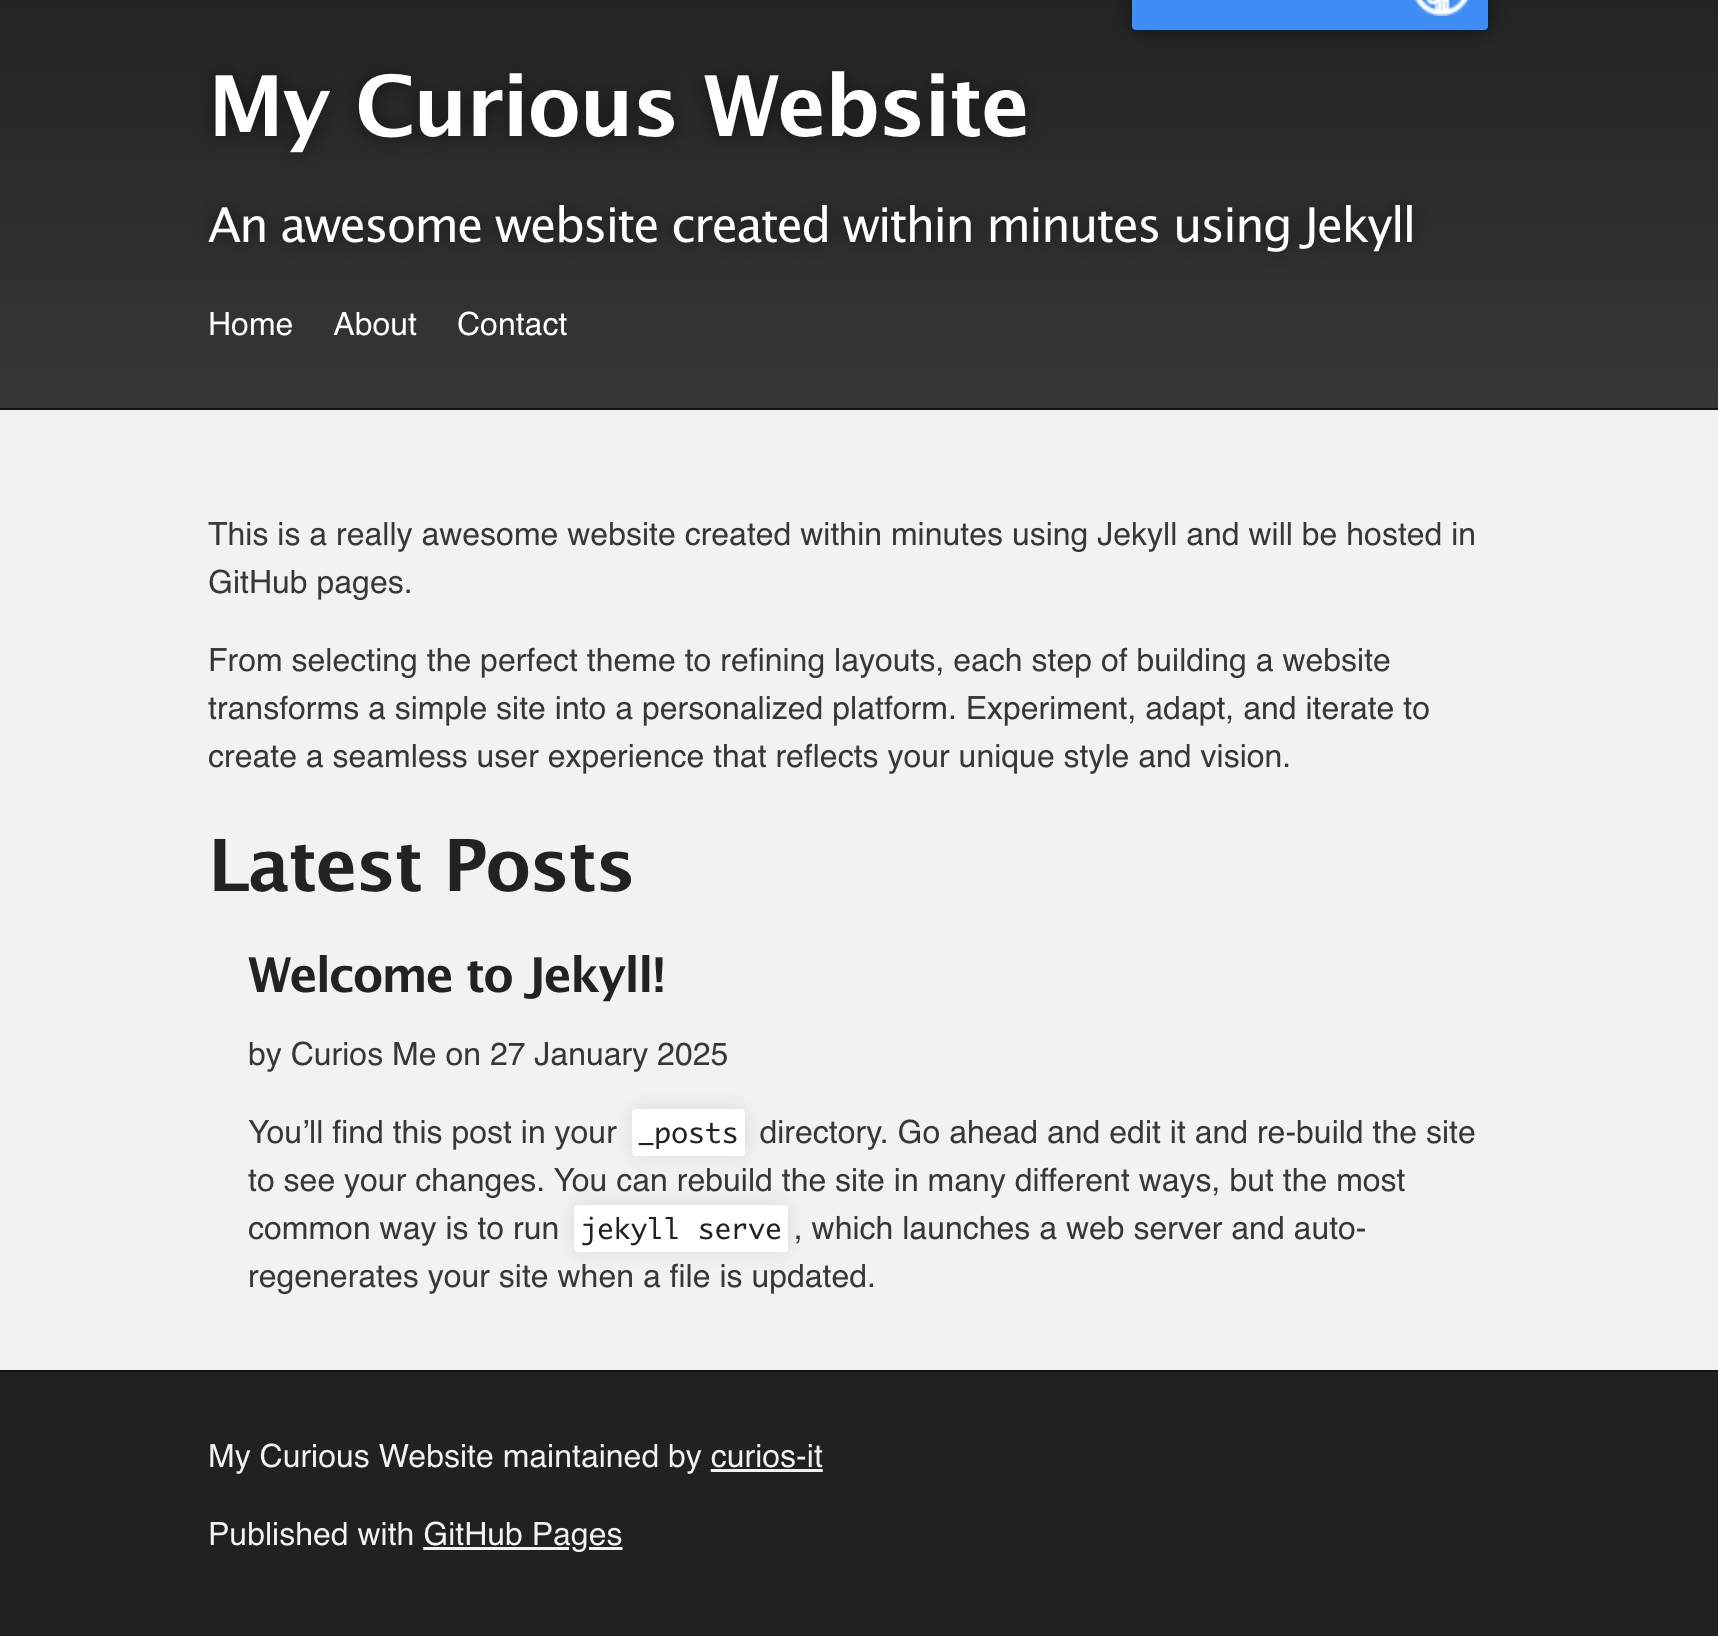
Let’s add a “Latest Posts” section to your home page to dynamically display recent blog posts.
- Navigate to your local theme folder and locate the
_layoutsfolder. - Create a new layout file named
home.htmlin the_layoutsfolder. -
Add the following code:
 ---
 layout: default
 ---
 {{ content }}

 <h1>Latest Posts</h1>
 <ul style="list-style:none">
 {% for post in site.posts %}
 <li>
     <a href="{{ post.url | absolute_url }}"><h3>{{ post.title }}</h3></a>
     <p class="view">by {{ post.author | default: site.author }} on {{ post.date | date: "%-d %B %Y" }}</p>
     <p>{{ post.excerpt }}</p>
 </li>
 {% endfor %}
 </ul>
This home layout will allow you to use the default template, embed any content from the other repository and append a list of blog posts at the bottom of the page.
Stage and Install Gem
Add the file to the staging area, then build and install the gem as explained in part 2:
    git add _layouts/home.html
    gem build jekyll-theme-slate.gemspec
    gem install jekyll-theme-slate-0.2.0.gem
The new changes should now be updated in the local gem.
Use the New Layout in the Content
Back in your content repository, locate the index.md file and change the layout to home.
  ---
  layout: home
  ---
As simple as that, your home page is now setup to use the new home template.
Test Changes
Rebuild and serve the website to see your new changes in http://localhost:4000/
3. Create a Post Layout
When clicking a post title, the full post might currently appear basic due to the default layout. To enhance it, create a new layout specifically for posts.
- In the local theme directory, Create a new file called
post.htmlin the_layoutsfolder. -
Insert the following code:
 ---
 layout: default
 ---
 <small>{{ page.date | date: "%-d %B %Y" }}</small>
 <h1>{{ page.title }}</h1>
 <p class="view">by {{ page.author | default: site.author }}</p>
 {{content}}
 {% if page.tags %}
   <small>tags: <em>{{ page.tags | join: "</em> - <em>" }}</em></small>
 {% endif %}
This layout ensures posts display metadata like the title, date, and author in a clean and structured format.
- Back in the content directory, ensure the post pages all have the layout set to
post.--- layout: post --- - Rebuild both repositories and serve/install accordingly.
4. Add a Navigation Bar Dynamically
To maintain consistency and flexibility, the navigation bar will be included in the template only if it’s enabled in the site’s configuration. Additionally, the navigation links will be dynamically generated from the configuration file to avoid hardcoding site-specific information into the layout.
-
Update the
default.htmlfile in the local theme directory to include the following code for the navigation bar. Add this snippet where it makes sense in the layout. For example, just below the tagline.{% if site.show_navbar %} <nav> <ul class="nav"> {% for link in site.navbar-links %} <li><a href="{{ link.url }}">{{ link.title }}</a></li> {% endfor %} </ul> </nav> {% endif %}This conditional block ensures the navigation bar is displayed only if the variable
show_navbaris enabled in the configuration file. -
To ensure the navigation bar matches your theme’s style, add the following CSS to
assets/css/style.scss:--- --- @import "{{ site.theme }}"; .nav { list-style-type: none; padding: 0; margin: 0; display: flex; color: white; } .nav li { margin-right: 20px; } .nav li:last-child { margin-right: 0; } .nav a { text-decoration: none; color: inherit; }These changes in the theme repository should display a Nav Bar based on the settings from the content repository.
- Back in the content repository, update the
_config.ymlfile to include the following settings that enables the navigation bar and define its links:# Custom theme settings show_navbar: true navbar-links: - title: "Home" url: "/" - title: "About" url: "/about/" - title: "Contact" url: "/contact/"The
show_navbarflag controls whether the navigation bar is shown, and thenavbar-linksarray allows you to define links dynamically. - Build and serve/install both of the repositories again and test it in the browser to check if all the changes are reflected.
You should now have a navigation bar that can lead you to Home, About and Contact pages.
5. Clean up, Commit and Manage Changes
In the content repository, remember to switch the theme back to the personal forked remote theme. In _config.yml:
# theme: jekyll-theme-slate # delete this line
remote_theme: curios-it/slate
Then, stage and commit the changes using the following commands:
    git add .
    git commit -m "Customised remote theme separately from the content directory"
    git push origin change_theme
In the local theme repository, remember to clean up the local gem as explained in part 2:
gem uninstall your_theme_name
Then stage and commit the changes like this:
    git add .
    git commit -m "customised theme layouts"
    git push origin customise_theme
Since you have worked on a different branch, it is a good practise to push your changes to the new origin branch and merge from there. You’ll need to create PR from the changed branch and merge to main/master branch before seeing these changes online.
Congratulations! You’ve now completed all the steps to create a fully functional, modular Jekyll website using GitHub Pages. With a dynamic home page, custom post layouts, and a flexible navigation bar, your website is ready for content updates, and managing themes separately from content will make future customisations a breeze.
This post is part 3 of the series: A Step-by-Step Guide Building Your Personal Website with Jekyll and GitHub Pages. Check out the other parts to complete your journey!
Part 1: Launch Your Personal Website with Jekyll and GitHub Pages
Part 2: Personalise Your Jekyll Website with Themes and Layouts
Part 3: Manage Content and Theme Updates Separately Using Git Remotes(This Post)