Welcome to Part 2 of the three-part series: A Step-by-Step Guide Building Your Personal Website with Jekyll and GitHub Pages.
In this post, we’ll explore how to customise your Jekyll website by incorporating a remote theme. This modular approach lets you experiment with different layouts and designs without altering your content, providing the flexibility to easily switch or update themes.

Personalise Your Jekyll Website with Themes and Layouts
Steps:
1. Switch to a New Branch
Before customising your theme, create a new branch called change_theme. Using a separate branch ensures your main branch remains unaffected while you experiment.
git checkout -b change_theme
2. Choose a New Theme
Visit GitHub Pages Themes and choose a supported theme that suits your style.
For example, you can try pages-themes/slate.
3. Update Configuration for the Remote Theme
In your project directory, open the _config.yml file and replace theme: minima with:
remote_theme: pages-themes/slate@v0.2.0
plugins:
  - jekyll-remote-theme
Then, in your Gemfile, add the following line to include the remote theme gem:
# Jekyll Theme
gem "jekyll-remote-theme"
4. Install and Build
To test your website, run the following commands and then visit http://localhost:4000/.
bundle install
bundle exec jekyll build
bundle exec jekyll serve --livereload
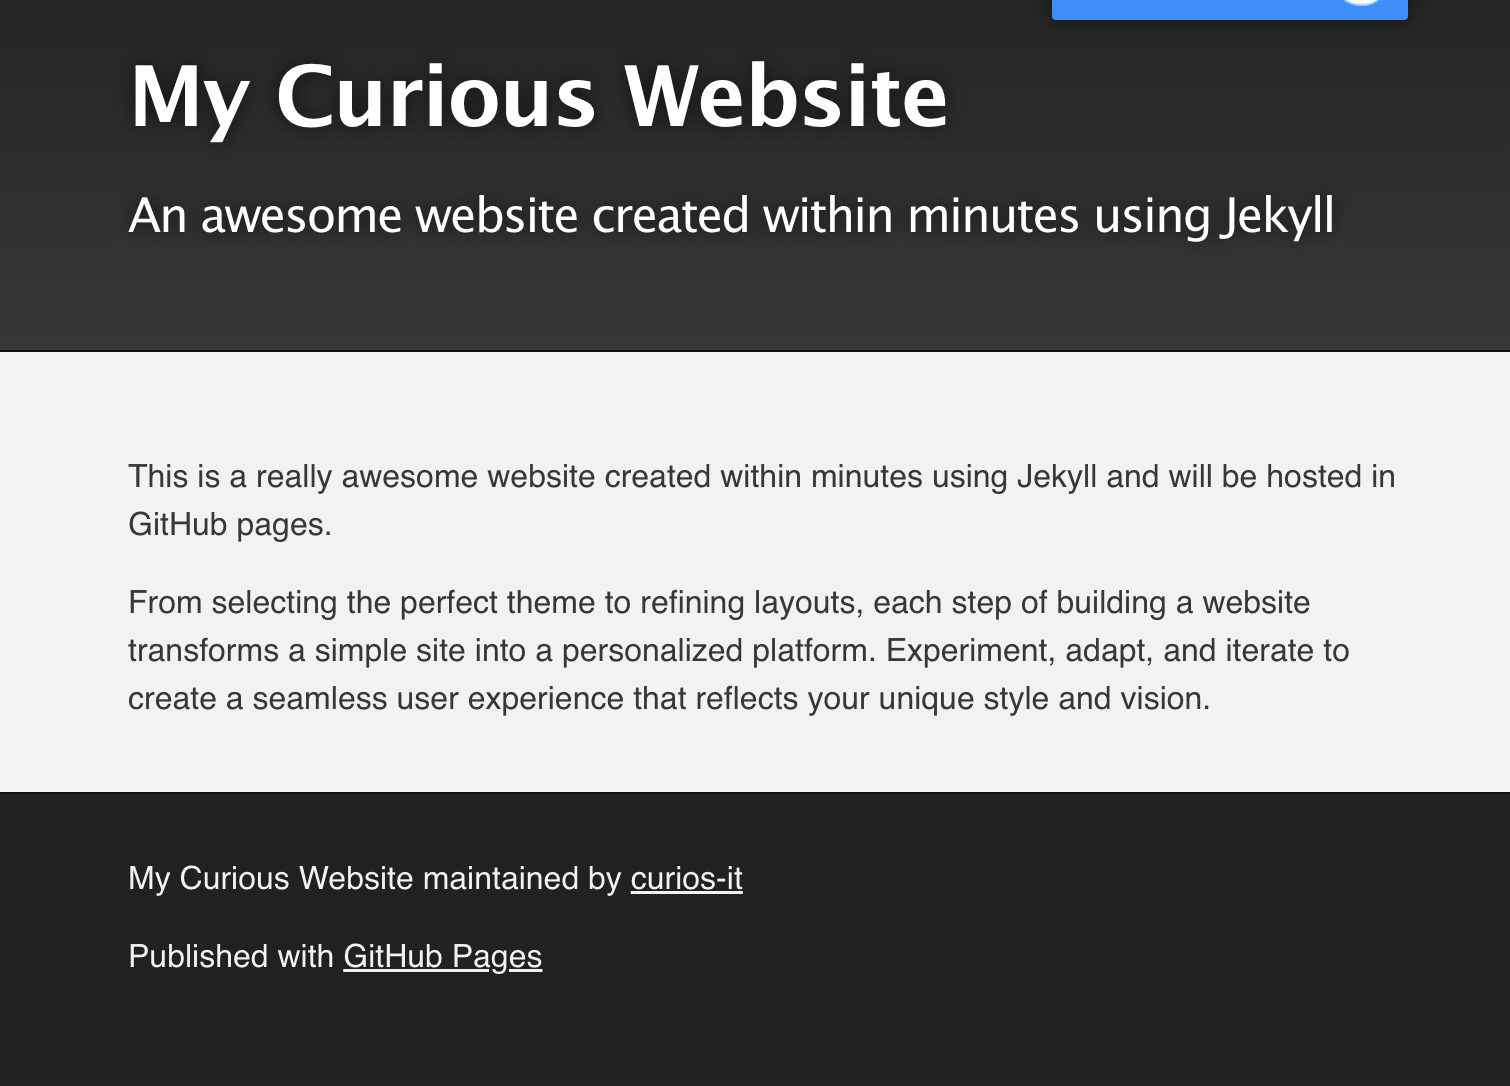
If everything is setup correctly, you should be able to see the new theme in your browser.
5. Adjust Layouts if Necessary
The Slate theme provides a default layout you will customise. Ensure all your pages specify layout: default. This ensures the theme is applied consistently.
6. Identify Potential Updates
At the moment, the website appears empty due to a lack of content. We want to enhance it by:
- Displaying blog posts in the home page beneath the existing content.
- Creating a post layout to display post pages neatly.
- Adding a navigation bar to display links to the “About” and “Contact” pages.
7. Address Modularity Issues
While this setup works, it’s not modular. The theme customisations are tightly coupled with the content repository, making it difficult to adopt new themes or update existing ones in the future. Modularity is crucial for maintaining flexibility and scalability in your website design.
Finding the Solution
Fork the theme repository to create a personal version. This allows you to modify the theme independently of your content, ensuring a cleaner and more maintainable setup.
8. Fork and Clone the Selected Theme Repository
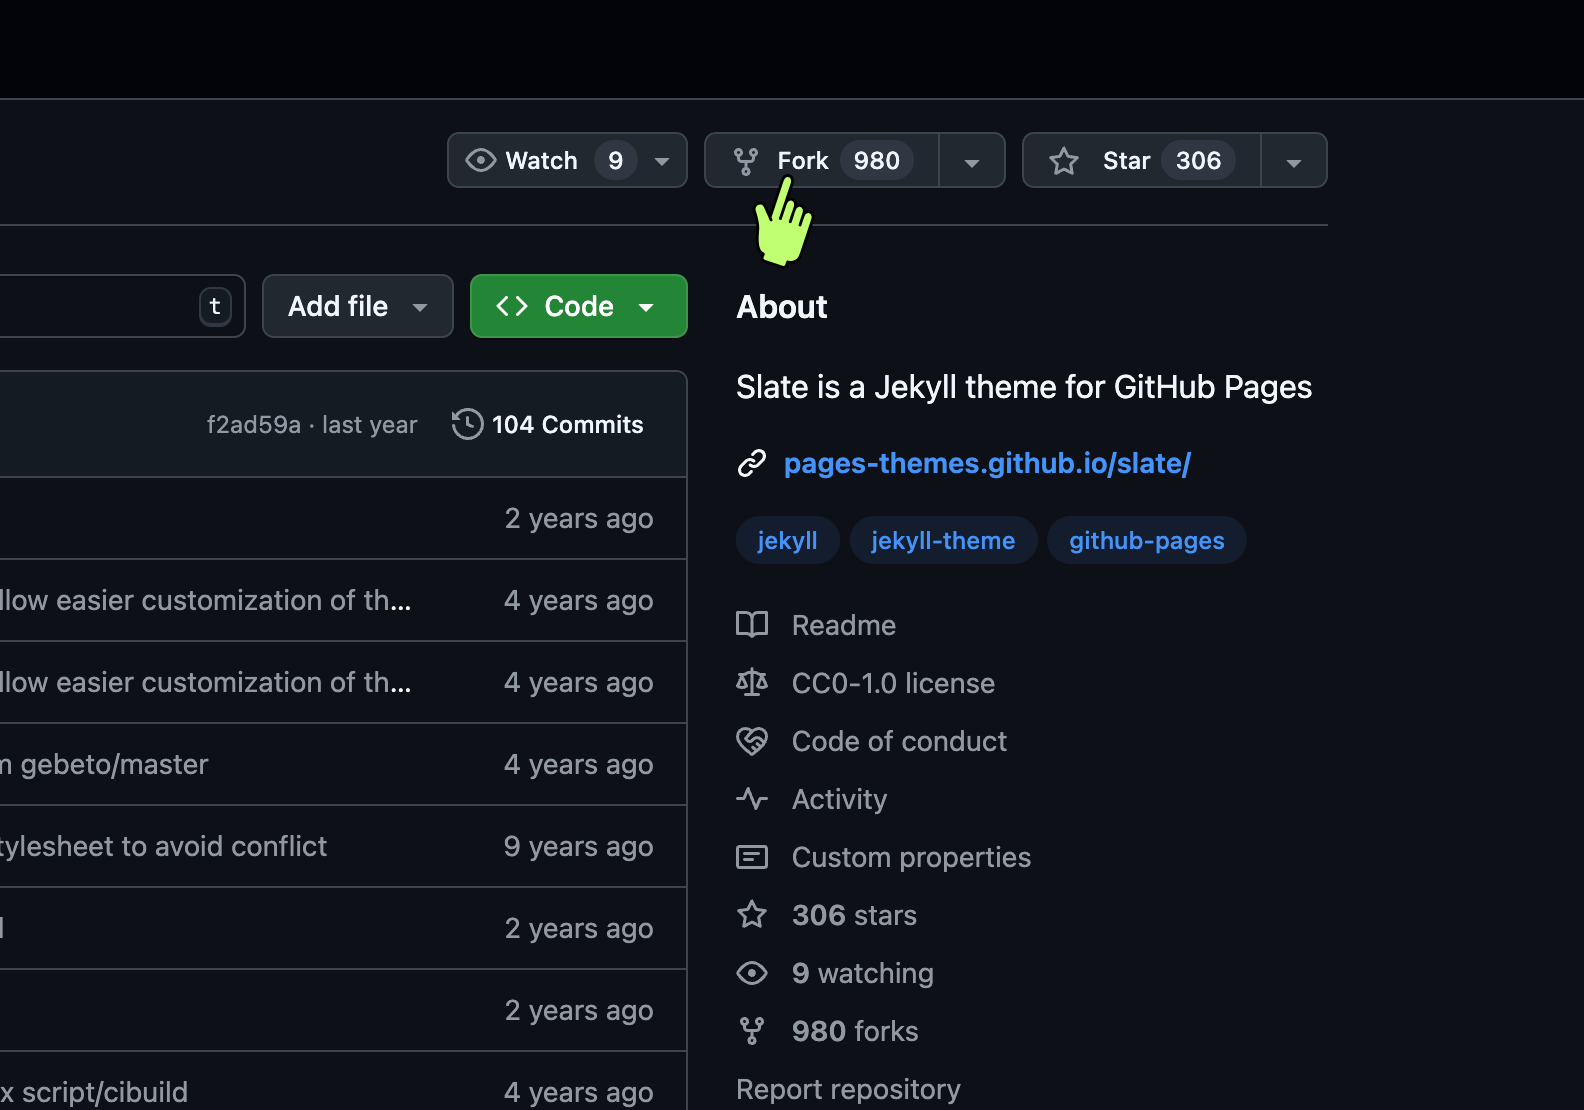
- Go to the GitHub page of the theme you want to customise, in our demo it is Slate Theme .
- Click the Fork button at the top-right corner to create a personal copy of the repository. This creates a new repository under your GitHub username.
- To clone the forked repository locally, open terminal run the following commands:
cd /path/to/project-directory/
git clone https://github.com/curios-it/slate.git
Note: Remember to replace the url from your own forked repository in GitHub.
Now you have a local copy of your forked repository on your machine, ready for modifications.
9. Navigate to the Local Theme Directory and Add Remotes
Enter the local theme repository and set up remotes for both your forked repository (origin) and the original theme repository (upstream).
cd /slate
git remote add origin https://github.com/curios-it/slate.git
git remote add upstream https://github.com/pages-themes/slate.git
- The origin remote points to your fork, where you’ll push your changes.
- The upstream remote points to the original theme repository, allowing you to pull updates from the original source.
By separating your content and theme repositories, you ensure your setup is flexible, scalable, and aligned with best practices.
10. Switch to Your Personal Theme
Go back to the content repository
cd /path/to/project-directory/curios-it.github.io/
Find the _config.yml file and change the remote theme to your personal forked repository:
remote_theme: curios-it/slate
11. Commit Changes
To save your progress in the content repository, stage and commit the changes using the following commands:
    git add .
    git commit -m "Switched to remote theme"
Your website is now configured with a remote theme and ready for further customisation.
12. Testing Locally
To test the theme locally, follow these steps:
Build the Local Theme Gem
  cd /path/to/project-directory/slate
  gem build jekyll-theme-slate.gemspec
The build output looks something like this:
Successfully built RubyGem
Name: jekyll-theme-slate
Version: 0.2.0
File: jekyll-theme-slate-0.2.0.gem
Copy the .gem file name from the output
Install Gem Locally
Install Gem using the command below, making sure to replace the .gem file name with the one shown in your output.
gem install jekyll-theme-slate-0.2.0.gem
Your local theme is now ready to be used as a Gem in other projects.
Update Content Repository to Use Local Theme
Update _config.yml to use the local theme instead of remote theme temporarily:
  # Undo these settings before pushing changes to GitHub
  # remote_theme: curios-it/slate # comment this line
  theme: jekyll-theme-slate # remove this line
Build and serve the content repository to preview the changes in a browser
13. Post-Testing Clean Up
After testing, always remember to clean up before pushing the changes to GitHub.
In the theme directory:
gem uninstall jekyll-theme-slate-0.2.0.gem
In the content directory, switch the theme back to remote:
remote_theme: curios-it/slate
Note 1: When you make new changes to the local theme, you’ll need to build and install gem again before seeing the changes on the reloaded website.
Note 2: When you add new files to the local theme, make sure to use git add to add the new file before building it to view the changes properly.
This concludes Part 2 of the series: A Step-by-Step Guide to Building Your Personal Website with Jekyll and GitHub Pages.
What’s Next?
In Part 3, we’ll focus on simplifying theme updates using Git remotes to make your setup even more flexible.
Part 1: Launch Your Personal Website with Jekyll and GitHub Pages
Part 2: Personalise Your Jekyll Website with Themes and Layouts(This Post)
Part 3: Manage Content and Theme Updates Separately Using Git Remotes